Thursday, January 6, 2011

Little Turkey

A day before Thanksgiving, I decided it would be fun to make a shirt for my 2 year-old to wear to Thanksgiving dinner. I had a plain blue shirt to work with. Not very harvesty, but oh, well.
To begin, I used some fabric paints to paint his palm and each of his fingers. I just used a separate bit of sponge for each color. His dad and I worked together to keep him from making a fist - not easy.
 

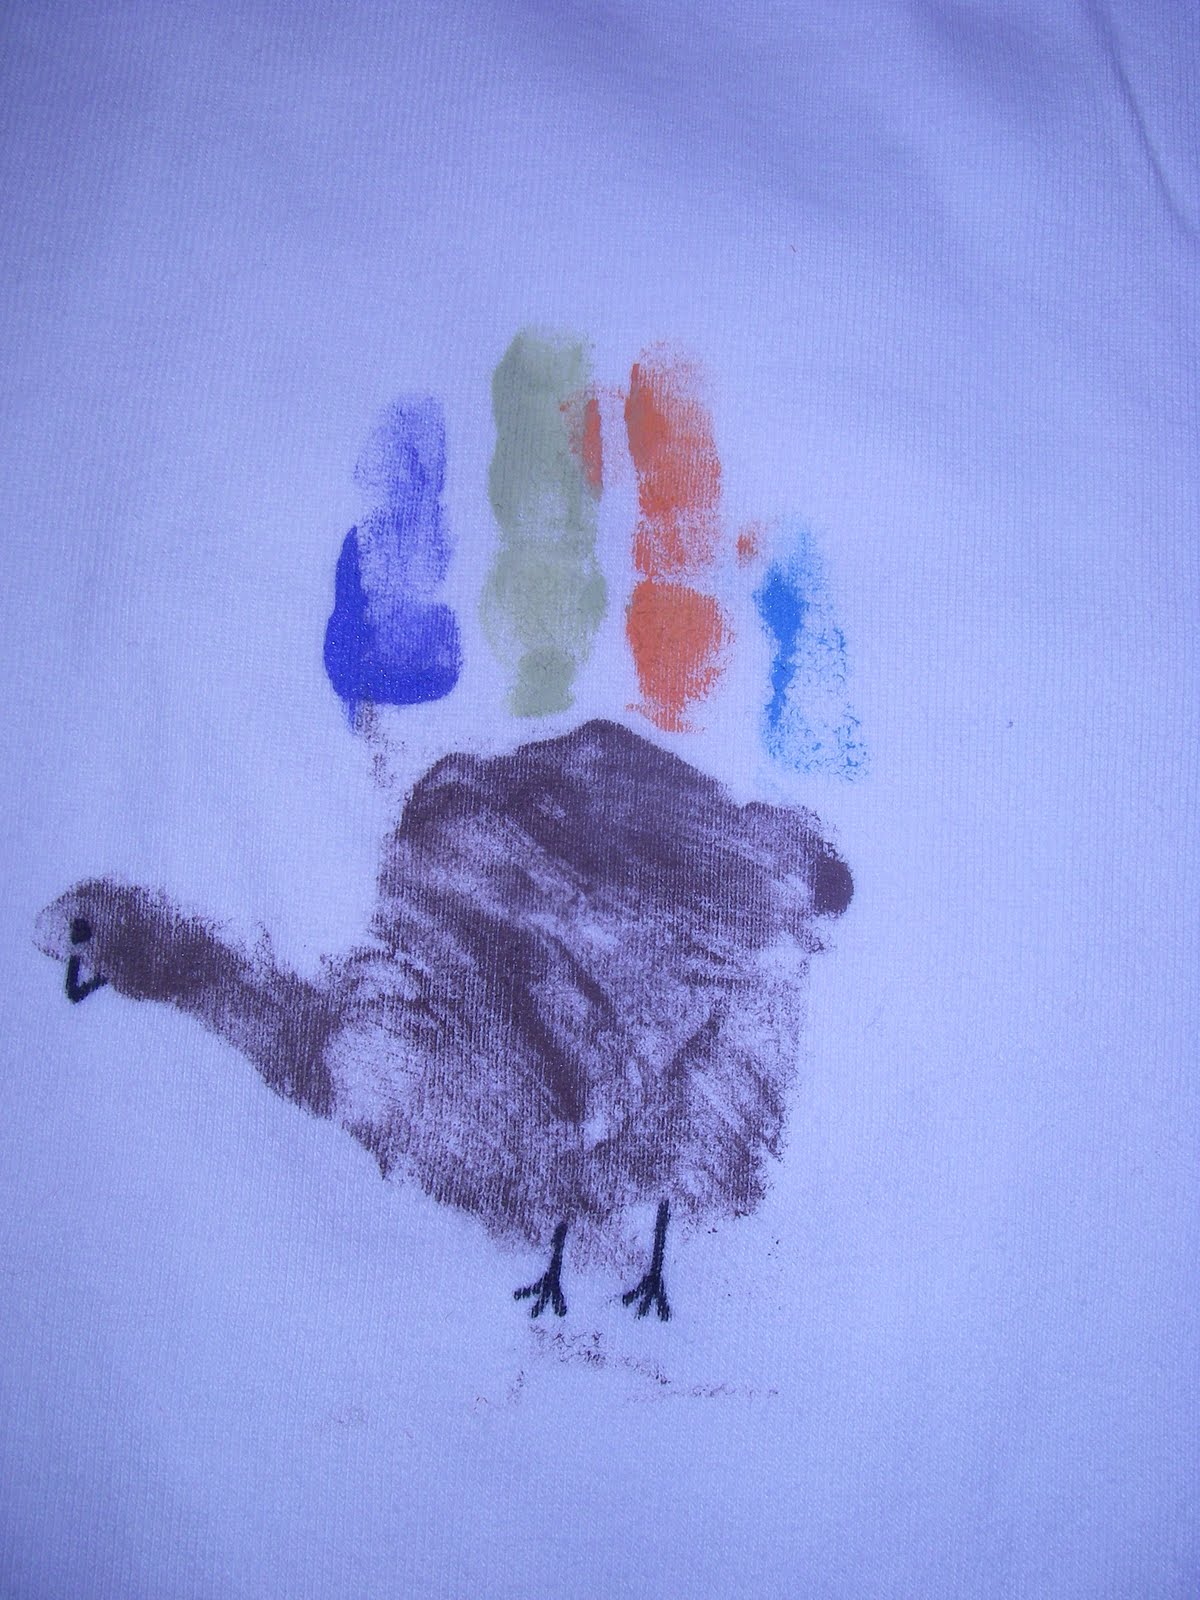
In the end, we had two hand prints to choose from.
I used a fine point fabric pen to add an eye, a beak, and little feet.


After letting the paint dry completely, I cut the fabric out in a square shape and sewed it to the blue shirt.
 
The beauty of the project, is that I can unpick the turkey and use the shirt for something else. The fabric square will be scrapbooked as a fun way to show how he's growing.

Saturday, November 6, 2010

Melts in Your Mouth Man

This week my nephew turned two. I asked Lance to call his dad for ideas on what he likes so we could find a gift for him. Among other things, his dad told us that he likes m&m's. No surprise there, I guess. Most two year-olds probably like m&m's.

My only problem was that I couldn't find a pattern to sew/crochet one. Several recent projects involved all the things I needed to know to create my own crochet pattern, though, so I decided I'd make it up as I went.

Here is the pattern that I used. You can follow it to make your own chocolate candy man or any circle shaped guy. I'm kind of reminded of those Little Mr. and Little Miss book characters when I see the body before I add the face.

Let me know if you have problems or see any mistakes.


Circle Man Crochet Pattern
Created by Celeste Bishop 11/2010
Supplies Used:
Hook: G
Yarn: Sugar n’ Cream (any medium weight yarn will work)
Stitch marker
Yarn needle
Circle body (make 2)
With red (or desired body color)
Ch 2, sc 6 in 1st chain
Row 1: 2 sc in each stitch around (12 sts)
Row 2: *2 sc in first, 1 sc in next* around (18 sts)
Row 3: *2 sc in first, 1 sc in next 2* around (24 sts)
Row 4: *2 sc in first, 1 sc in next 3* around (30 sts)
Row 5: *2 sc in first, 1 sc in next 4* around (36 sts)
Row 6: *2 sc in first, 1 sc in next 5* around (42 sts)
Row 7: *2 sc in first, 1 sc in next 6* around (48 sts)
Row 8: *2 sc in first, 1 sc in next 7* around (54 sts)
Row 9: sc in first 4, *2 sc in first, 1 sc in next 2* around (60 sts)
Row 10: sc in each st around
Finish off
Legs (make 2)
With white (or desired shoe color)
Ch 2, sc 6 in 1st chain
Row 1: 2 sc in each stitch around (12 sts)
Row 2: *2 sc in first, 1 sc in next* around (18 sts)
Row 3-5: sc in each
Row 6: sc 2 tog 6 times, 1 sc in next 6 (12 sts)
Row 7: sc 2 tog 3 times, 1 sc in next 6 (9 sts)
Row 8: ss around (don’t make it too tight)
Change to flesh color
Row 9: work in the stitches created in row 7, sc around (9 sts)
Row 10-20: sc in each around
Finish off
Arms (make 2)
With white (or desired glove/hand color)
Ch 2, sc 6 in 1st chain
Row 1: 2 sc in each stitch around (12 sts)
Row 2-4: sc in each around
Row 5: *sc 2 tog, sc in next* around (6 sts)
Change to flesh color
Row 6-15: sc in each around
Finish off
To Assemble:
Embroider or appliqué any face or designs to body.
Stuff arms and legs.
Pin arms and legs in place on body.
Sew around edge of body with yarn. Leave an opening for stuffing.
Stuff the body and sew it closed.


Saturday, October 30, 2010

Elmo

My son loves Elmo. I'm not really sure why this love started, because he loved Elmo long before he ever saw Sesame Street. Elmo shows up in a lot of his books, on sippy cups and even his toothbrush, so maybe that's why.
I looked for an Elmo doll for his birthday last month. All I could find were the really hairy Elmos. After seeing what happened to my son's current favorite toy, "Monkey," with his matted fur that's full of fuzz, and dried grass, and who knows what else; I couldn't bring myself to make a purchase. Plus, Elmo dolls cost more than I think they should. I have a hard time paying 20-30 dollars for something that's just going to be dragged around and slobbered on (or worse, Monkey has been in the toilet...)
I decided to look around online for a pattern to crochet Elmo. I found exactly ONE pattern. I didn't like how Elmo's mouth was open so WIDE in the pattern, but I couldn't find another, and I didn't want to take the time to try and make it up. In the end, I made the doll as instructed then sewed the mouth closed a little on each side with red yarn. It seems to have done the trick.
The only problem I had with the pattern was on the black part of the mouth. When I made it as big as it instructs, it's WAY too big for Elmo's mouth. I ended up leaving out several rows. My logic was that if Elmo's mouth opening is 23 stitches across, the mouth insert ought to be the same. So I suggest following the mouth pattern until you have 23-24 stitches and then stopping. I also recommend that you follow the advice to put something stiff inside the head to keep the mouth flat. It looks a lot better that way.
I'm saving Elmo for a few weeks until the baby comes so big brother can have a new someone to cuddle as well. I'm pretty sure he's going to love him though.